
Table of Contents
What is Anki?
Anki is a flashcard app that has gotten me through all of undergrad, through all of vet school, and more recently is helping me get through my pathology residency! It has a sciencey backing and stuff, for maximum learning.
Where do I get it?
Go to https://apps.ankiweb.net/ and click the big Download button. This will get you the full-fledged version of Anki! It looks something like this:

Now keep in mind I do have a bunch of add-ons (more on that later) so mine might look slightly different than yours, but you get the idea!
Making Decks
So… now what? Well, the next thing to do would be to start making flashcard decks! Or, you can import one of our premade decks.
Creating a Deck
To create a deck, simply click the “Create Deck” button at the bottom of your Anki window. Then name your deck in the window that pops up. Easy!

Importing a Deck
Importing a deck is easy, simply click the “Import File” button, then find the .apkg file.
Adding Cards
Now you have an empty deck… cool? Super exciting, I know. So lets fill your deck with knowledge! To start adding cards, simply click on the name of your deck. That will bring you to a screen like this:

Click the “Add” button at the top. That will pop up a window that looks something like this:
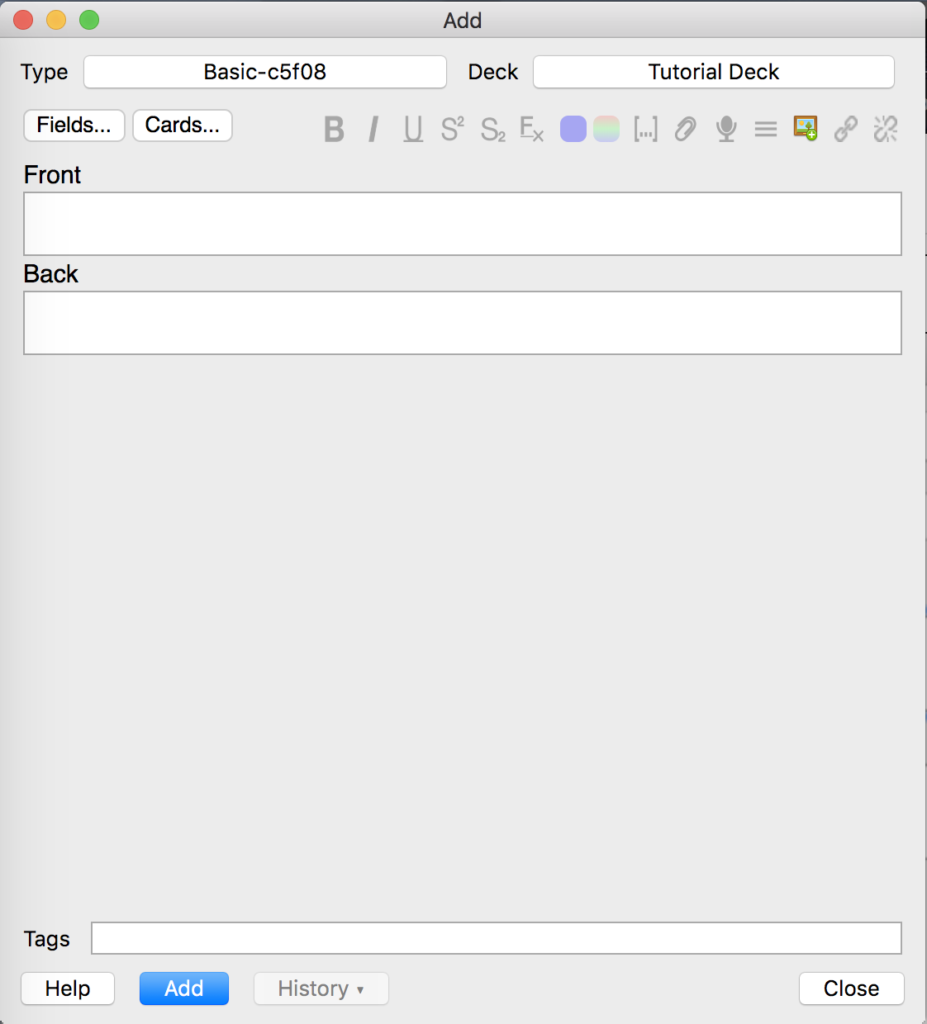
It’s pretty straightforward, just put what you want your question or front of the card to be in the “Front” section, and the answer in “Back”. Like this:

Then click Add! A pro-tip for those of you entering tons of flashcards: instead of clicking the Add button, you can also hit Ctrl/Command + Enter. Maximized efficiency!
Studying your Cards
This is really the meat and potatoes of using Anki, so I want to spend a bit of time on it. There are two basic modes that I use to study: daily study, and cramming. Lets be real though, most of my studying is cramming 😉
Daily Study
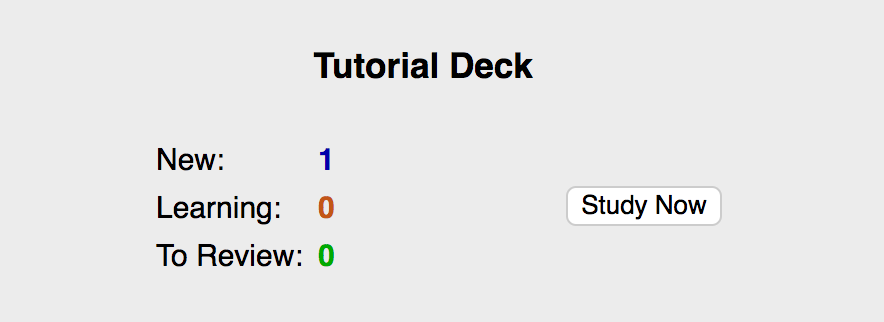
Daily study is pretty easy to set up. If you go to your Decks window, you will see that there are little numbers next to your deck names. Green is the number of cards you have previously seen that you have to review today. Blue is the number of new cards you have to review today. If left to its own devices, Anki will actually do scheduled repetition based on when the app predicts you’ll have forgotten that information, to maximize your learning. Neat!
Unfortunately for us though, there is a ton of information to learn in veterinary medicine. So leaving Anki to its own devices can quickly lead to a very overwhelmed vet student! So we can tell it to cool its jets a little bit. Next to your deck name is also a Settings cog icon. Click it, then click “Options”.

That will bring up a window that looks like this:

This window is where you can adjust the maximum number of cards Anki will present to you in a day. Keep in mind you are likely editing your default deck setting right now, so this will apply to all of your currently made decks. If you click “Manage”, you can add other setting templates, each with their own settings. Once they are made, you can apply them to a deck by going to the deck’s options and changing the dropdown menu at the top to that setting group. But for now, lets look at the default!
The first tab, “New Cards” determines how many new, never-before-seen flashcards Anki will present you per day from each deck (see new cards/day). Similarly, the “Reviews” tab determines how many previously-seen cards Anki will give you.
I also prefer to set the “Order” dropdown to Random, because I get exposed to little bits of information from all over the place. This is totally personal preference though! Sometimes you need your flashcards to “walk you through” a condition before you would feel comfortable doing them randomly. Don’t worry about the other fields, unless you want to become an Anki super-user!
Depending on your number of decks, I like to keep these numbers quite low. In my busy life, I found about 50 cards total per day to review a reasonable number that I could actually keep up on. For me, 50 cards works out to about 30 minutes of studying.
Once you have all that set up, simply click on your deck name, then click “Study Now”.
You’ll then get presented with your first flashcard! You can either click “Show Answer” at the bottom, or hit the spacebar to flip the card. Once you’ve revealed the answer to a question, you will be presented with three options:
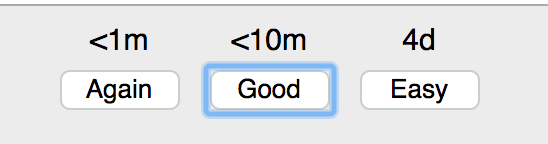
These options correspond to how difficult you thought the question was. If you didn’t know it at all, click “Again”, and Anki will give you the card again in 1 minute. If you knew it, but weren’t super confident, click “Good”, and you’ll see it again in 10 minutes. If you knew it 100% in your sleep, click “Easy”, and you won’t see it again for 4 days.
As you start working through your flashcards, you’ll see that the time intervals above these options changes. This is Anki doing its scheduling to try and predict when you’ll have forgotten information. So just trust its process, and let it do its thing! But bear in mind that the app is relying on you to do more or less daily studying to have its process work.
Cramming
So if you’ve played around with Daily Study for a while, you might find that your big exam is coming up… and you’re only halfway through your notes! *panic*
Don’t worry though, Anki has a built in alternative to its slow, but scientifically driven methodology. And that is cramming.
If you have a deck that you need to pour into your brain at a rapid pace, simply click on the deck. Then go to Tools -> Create Filtered Deck, or press F.

That will bring up this window:

The first thing you’ll want to do is delete “is:due” from the Search field. That way, Anki will give you all of the cards in the deck, not just ones that it decided you need to review. Next, you’ll want to adjust the number of cards to however many you want to do during your study session. Then, change the dropdown menu to either Random or Order Added, depending on how you prefer to study.
Note that it is actually better for your ability to write an exam if you can do your cards on Random, but it is better for learning the material the first time to do the cards on Order Added (assuming you made your cards in a somewhat logical fashion). I used to try and get through all of my cards on Order Added first, 4-5 days before the test, then go back and review them on Random in the lead up to an exam.
In your deck menu, you’ll now see a deck with a blue name, probably called “Filtered Deck 1”. This is your cramming deck! It contains all of the cards from the deck you selected, and now you can just power through them. You can rename the deck to “OMG MY TEST IS IN 3 DAYS” or whatever you want by clicking the Settings cog -> Rename.
I have so many decks and my life is chaos!
Same, girl, same. One thing I strongly recommend is organizing your decks by topic or class. You can “nest” the decks by clicking and dragging a deck on top of another one.
For example, here are my decks for my residency. I’ve organized them by which board exam the flashcards are relevant for, as well as by source of the information. For vet school (or any other school), I recommend organizing by course -> general overarching topic (e.g. Gastrointestinal for pathology).

I have so many *cards* and my life is chaos!
Welcome to my life! No really, I currently have 143 000 cards. Besides having them organized into decks, another great way to organize them is using tags. In the “add a card” window, you might notice another field at the very bottom. This is where you can put your tags! I usually like to tag them with the topic and course. For example:

Anything with a space between it will be a new tag, so I like to use underscores for longer tag titles. So in this example, this card would be tagged “Male Reproductive System” and “Equine”.
Whatever you enter in this field will be automatically filled into the next card you add, which is super convenient!
Now that you have the tags set up… what do you do with them? On your main Decks window, there is a button at the top called “Browse”. This brings up the Browse menu:
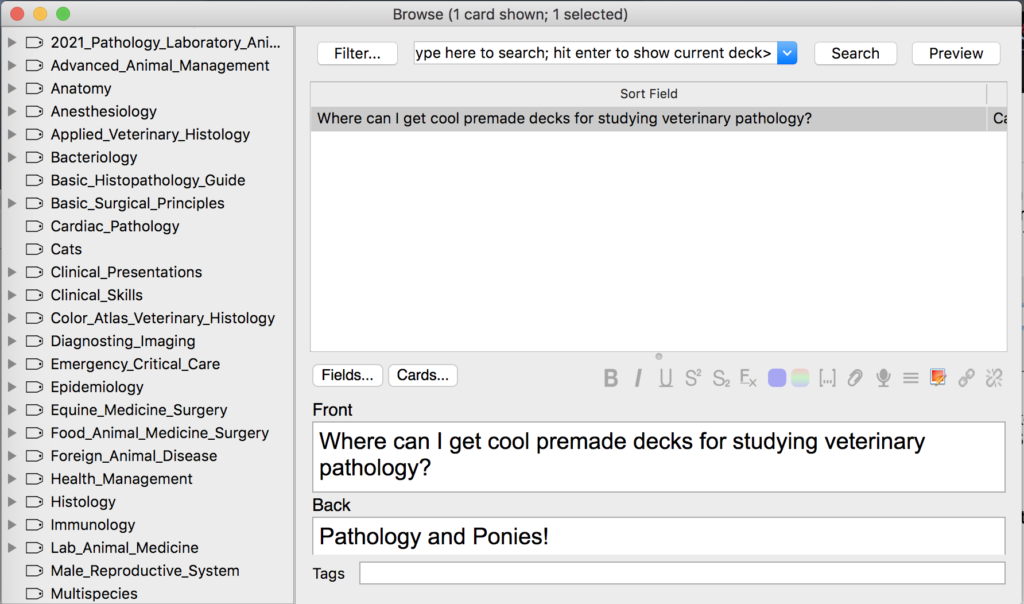
There’s a bunch of fun things you can do from this menu. Not only can you look at all of your cards you’ve made, and edit them, you can also see on the left hand sidebar that there is a list of tags. Clicking on a tag will bring up all of the cards that you have tagged with that tag (how many times can I say tag in a sentence…).
If you click on a tag, you may notice that the text field at the very top changes to something like “tag:Male_Reproductive_System”. If you copy that text snippet, you can actually use it to make a Filtered Deck (see Cramming). Neat!
Hierarchical Tags
To take that previous feature a step further, one super useful add-on you can download is called Hierarchical Tags. To add an add-on, simply go to Tools -> Add-ons -> Get Add-Ons and enter the code on the add-ons website. In this case, 594329229.
What Hierarchical Tags does is it allows you to nest your tags within each other. For example:

In the tag field, you use :: to mark each nested tag, like so:

So this card would be found under both Toxicology -> Large Animal Toxicology, and Toxicology -> Specific Toxicities -> Zealeronone.
The way that I typically used this feature was to mark each lecture with its own tag, so if I ever wanted to specifically study a lecture I could. So my typical format would be Course_Name::General_Topic::Lecture_Name. With this formatting, I could make a filtered deck for the whole course, a general topic within the course, or just one specific lecture… all without having to have separate decks for each of those entities. Super helpful!
I want to make flashcards of diagrams or tables!
Great! Diagrams can be a super useful way to learn, and there is a great add-on for helping you convert them into flashcards. Check out Image Occlusion. You can install it from Tools -> Add-ons -> Get Add-Ons and entering the code 1374772155.
Once you have it installed, you’ll notice a new button on your “add a flashcard” panel.

Clicking it will either bring up a window for editing whatever image you had most recently copied, or a menu for you to select an image to use.

I’m going to use this nice table from a lecture as an example. On the left, you can see that the “Draw a Box” icon is selected. I’m going to use this to draw boxes to block out the information I want to “hide” on my flashcards.

If you want to add tags, click the “Fields” tab at the top. Once you have your information blocked, you can choose either “Hide All, Guess One” or “Hide One, Guess One”. For cards where Hide All, Guess One is selected, all of your boxes will be present on the card, with one box highlighted. When you flip the card, only the highlighted box will be uncovered.


This format is best for things like tables, where you don’t want the other answers to give you a clue as to what was covered.
Conversely, in Hide One, Guess One, none of the other boxes will be covered, only the highlighted box. This format is best for things like flowcharts or other diagrams, where you need some context to help you understand what might be underneath the box.